
Behind the Chair
Clipper-Over-Comb: How to Build Shape Without Taking Too Much
Improve your clipper-over-comb technique with practical advice on comb angles, sectioning, weight control, and connecting short sides to longer hair.
October 17, 2026

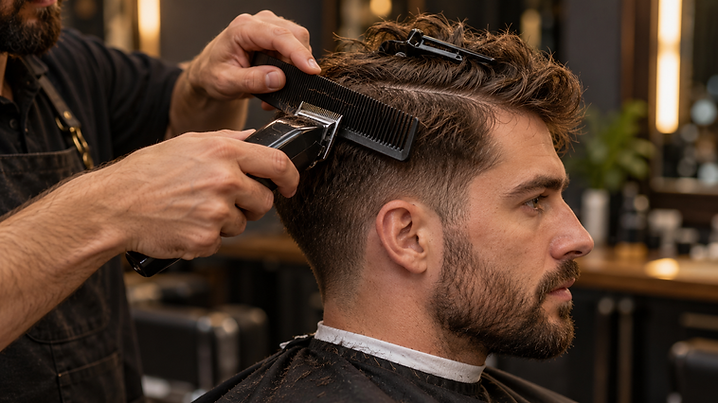
The sides are clean. The top has the length the client asked for. But where the two meet, something looks heavy.
You lift the hair with your comb and take a pass. Better. You take another. Then the client turns slightly, and you realize the corner you wanted to preserve is disappearing.
Clipper-over-comb can make that connection look effortless. It also gives you enough freedom to remove more than you intended.
The skill starts in the hand holding the comb. That hand decides what stays, what goes, and what shape the haircut will have when the hair falls back into place.
What is clipper-over-comb?
Clipper-over-comb is a haircutting technique in which you lift hair with a cutting comb and use clippers to remove the length extending beyond it. Instead of relying on an attachment guard to establish length, you control the cutting plane through the position of the comb.
Wahl describes the technique in terms of elevating the hair to the desired projection angle, then cutting across the comb’s surface.
It is useful when you need to connect short sides to longer hair or refine weight in a particular area. The extra control comes with a responsibility: you need a clear idea of the shape before taking the pass.
Decide what you want to keep
Before asking where the haircut looks too heavy, ask where it needs support.
Does the client want a square silhouette through the upper sides? A closer shape following the head? A fuller corner that supports a side part?
Those are different decisions.
Imagine a client who likes some width above the temples. If you keep chasing every bit of darkness in that area, you may remove the fullness they wanted. A smooth connection can still contain weight.
Use the consultation and reference photos to agree on that distinction. “Keep some fullness here?” is a much more useful question when you can point to the exact area.
Section away the hair you are saving
Longer hair falling into your working area makes it harder to see the connection you are trying to build.
Create a clean section and secure the hair that should stay out of the cut. Sam Villa’s sectioning education emphasizes this setup as a way to maintain control and avoid accidentally cutting hair intended for another part of the style.
Check behind the section, too. A few loose pieces slipping out of a clip can confuse the outline.
This preparation is especially helpful when a client has a long top over much shorter sides. You want to see the boundary clearly before deciding how much connection the haircut needs.

Set the comb, then bring in the clipper
When you are learning, give yourself a moment between lifting the hair and cutting it.
Insert the comb, lift the section, and look at what extends beyond the teeth. Can you see the guide? Are you holding the intended angle? Is this the amount you meant to remove?
Then make the pass.
Keeping those actions distinct during practice helps you notice a wandering comb before the clipper follows it. Speed can develop later. First, make the position repeatable.
Start with less removal than you think you need. Release the hair and assess it before moving closer. You can refine a section that remains a little long; correcting a hollow area is much less forgiving.
Let the comb angle serve the haircut
The head curves. Your intended silhouette may follow that curve closely, or it may need more length in particular areas to create a different outline.
Sam Villa’s education on over-comb cutting distinguishes between contouring around the head and establishing a stronger, more structured shape. Comb orientation and section choice affect that result.
Avoid treating one hand position as suitable for every part of the haircut. As you reach the upper sides, check whether your comb is preserving the corner or quietly cutting into it.
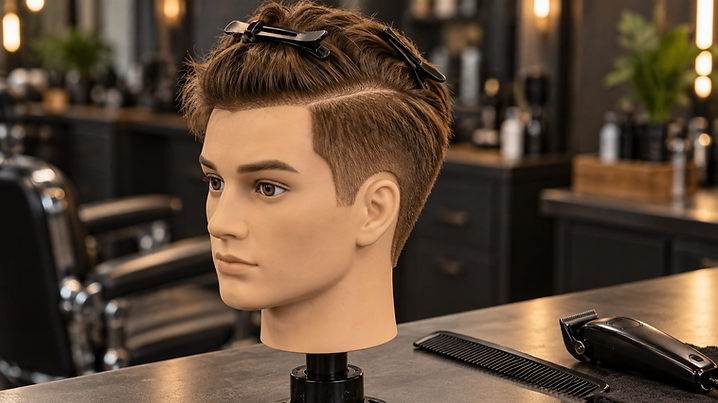
On a mannequin, try shaping one side closer to the head and leaving the other fuller. Study the difference from the front. That view can make the effect of weight placement much easier to understand.
Keep the cutting action within the comb
The comb should give you a visible, controlled working area.
Andis’s progressive fading guide advises adapting how much of the blade you use to the size of the comb. A smaller barbering comb calls for a smaller working portion of the blade so you do not cut hair outside the supported area.
Choose a comb you can hold steadily, and keep your fingers clear of the cutting path. Avoid pushing the clipper hard enough to shift the comb.
If the section feels awkward, reset your position. Rotate the chair or move your feet until you can see and control the pass comfortably. An awkward reach is a poor place to test your accuracy.
Connect small sections and keep checking the guide
Working across a large amount of hair at once can make the process look fast while leaving you uncertain about what happened inside the section.
Use manageable sections. Bring enough of the established guide into the next section to maintain a connection, and keep checking your angle.
After a few passes, release the hair completely. Comb it into the way the client is likely to wear it.
Ask yourself:
- Has the heavy area improved?
- Is the intended fullness still there?
- Does the section connect when it falls naturally?
- Are you correcting a remaining problem or cutting again out of habit?
That final question is easy to overlook when the clippers are already in your hand.
Troubleshoot the shape before cutting more
If the result looks uneven, slow down and describe what changed.
A hollow area: Review how close the comb moved toward the scalp and whether its angle changed. Avoid immediately shortening everything around it to match.
A ledge near the top: Check the connection with the longer section. Decide whether the weight is intentional before removing it.
An uneven surface: Re-comb, take a smaller section, and locate the guide before another pass.
A shape that looks good lifted but awkward when released: Reassess how the hair naturally sits and how the client wears it. The finished position deserves as much attention as the cutting position.
These are starting points for assessment. The next move depends on the hair and the shape you are creating.
Give yourself a better practice goal
“Get faster at clipper-over-comb” is difficult to measure.
A more useful practice goal is: “Build a balanced upper-side connection while keeping the fullness I planned.”
Take photographs before and after, using the same angles and lighting. Review the front, profile, and back. Note where you changed the comb angle and whether the result matched your intention.
You are looking for a repeatable decision, not a lucky pass.
A finished haircut should make sense when the client turns, touches their hair, and wears it outside the shop. Keep checking that whole picture. The purpose of clipper-over-comb is to give you control over the shape—and sometimes the best use of that control is leaving a little more hair in place.
Show potential clients the detail in your work. Explore BarberScope and share a portfolio that reflects your style behind the chair.